Extranet Basic
Created by Orckestra
Extranet User Guide
- Introduction
- Creating and Managing Users and Groups
- Setting Security on Pages and Files
- Setting Up Optional Functionality
- Test Your Knowledge
Creating and Managing Users and Groups
Before you start protecting web pages and other resources of your website, you should define who can access them.
First, you should add users to your extranet. Then, you need to create extranet groups. Finally, you have to assign the users to the groups.
In the following few sections, we will cover all these steps in more detail.
Each approved extranet user will be able to access all the pages and media files on your website after having logged in successfully.
You create an extranet user account by specifying the user’s credentials, name, and, optionally, email address as well as indicating whether this user will be immediately approved to access the extranet.
To create anextranet user account:
- In the Extranet perspective, expand Extranet.
- Select Users and click Add User on the toolbar.
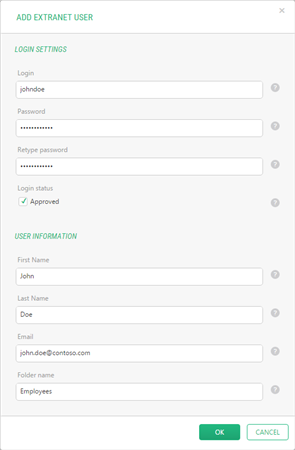
- Fill out the fields in the Add Extranet User dialog providing the login and user information:
- Login: The name the user should specify when logging in. Required.
- Password: The password the user should specify when logging in. Required.
- Retype password: The password repeated. Required.
- Login status: The option that indicates whether the user is approved for logging in. Selecting this option will give the user access to your extranet immediately. This is a default value. You can also choose to approve the user later.
- Name: The first and last names of the user. Required.
- Email: The email address of the user. It can be used for sending the password to the user if forgotten.
- Folder: The folder under Users where this user will be found. It is used for grouping users by a certain criterion (for example, all your customers) and helps quickly find a user. If the folder you have specified does not exist, it will be created automatically.
Figure 2: Creating an extranet user
- Click OK. A new user account has been added to your extranet.
You can create as many user accounts as you need.
Once you have created all user accounts, go on to create user groups.
If you want to change the extranet user’s password or approved status, you should edit this user’s account settings.
In addition to the properties you have set up when you created a user account, you can set up other properties such as the user’s locked-out status and groups the user belongs to.
To edit an existing user account:
- In the Extranet perspective, locate and click the user account you want to change settings for and click Edit User on the toolbar. The user account settings form opens in the right pane.
- On the Settings tab, change the settings where necessary. Most settings are familiar to you from the steps of creating a user. Additionally, you can set up the following properties:
- Locked out: This option indicates whether the user has been locked out.
- User Groups: In this list you specify which groups the user belongs to. You can edit the list by clicking Edit Selections and selecting the groups in the User Group dialog.
- Comments: Additional information about the user.
Figure 3: Editing an extranet user
- On the Password tab, change the password if necessary.
- Click Save.

The Extranet add-on keeps track of user account activities such as the date and time of the last user’s login to your extranet or the date and time of the user’s last activity.
To view an existing user’s history information:
- In the Extranet perspective, locate and click the user account you want to change settings for and click Edit User on the toolbar. The user account settings form opens in the right pane.
- Click the History tab and view the history information related to this user account:
- Created: The date and time when this user account was created
- Last login: The date and time of the user’s last login to the extranet
- Last password change: The date and time of the last change of the user’s password
- Last locked out: The date and time of the user account’s last lockout
- Last activity: The date and time of the user’s last activity within the extranet
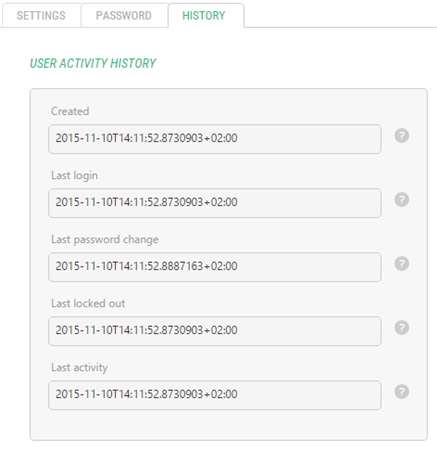
Figure 4: Viewing an extranet user’s history
To delete an existing user account:
- In the Extranet perspective, locate and click the user account you want to delete and click Delete User on the toolbar.
- Click OK in the confirmation dialog.
The user account has been deleted from your extranet.
With groups, you can quickly manage access to web pages, media files or an entire website for multiple users. You create groups by specifying their names and, optionally, descriptions.
To create an extranet group:
- In the Extranet perspective, expand Extranet.
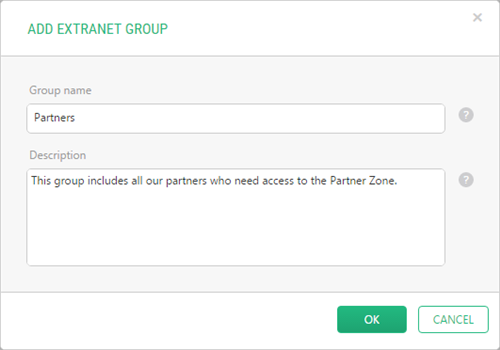
- Select Groups and click Add Group on the toolbar.
- Specify the group’s name and description in the Add Extranet Group dialog.
Figure 5: Creating an extranet user group
- Click OK.
You can create as many user groups as you need.
Once you have created all the groups, proceed to assign users to the groups.
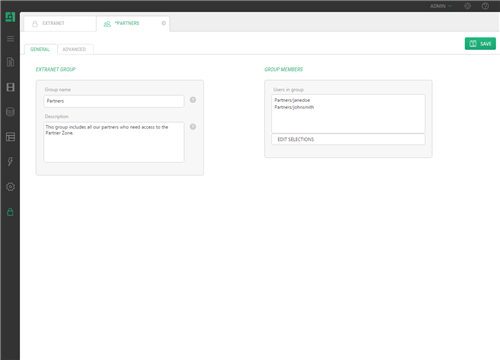
When you are editing an extranet group, along with changing its name or description, you can also assign users to this group as well as set up a number of advanced properties that manage the group’s permissions.
To edit a user group:
- In the Extranet perspective, locate and click the user group you want to change settings for and click Edit Group on the toolbar. The user group settings form opens in the right pane.
- On the General tab, change the name or description in the corresponding fields if necessary.
- Assign users to the group by clicking Edit Selections and selecting users in the Users in Group dialog.
Figure 6: Editing an extranet user group
- On the Advanced tab, set up the following properties where necessary:
- Add, delete child groups: If this option is checked, you will be able to add and delete child groups within this group. For this, an additional command will appear on the context-sensitive toolbar and in the context menu of this group – Add Group. By default, this option is unchecked.
- Add, remove users: If this option is checked, you will be able to add users to, and delete users from, this group. By default, this option is checked.
- Can be assigned access rights: If this option is checked, this group will be available for granting access to in the Content and Media perspectives when protecting web pages, media files or entire websites. By default, this option is checked.

Figure 7: Setting up an extranet user group’s advanced properties
To delete an existing user group:
- In the Extranet perspective, locate and click the user group you want to delete and click Delete Group on the toolbar.
- Click OK in the confirmation dialog.
The user group has been deleted from the extranet.
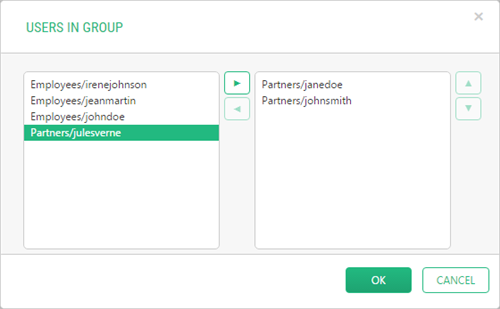
Each user group should include one or more users. You assign users to user groups by editing groups and selecting one or more available users from the list.
To assign users to a group:
- Expand Groups, select the group you want to assign users to and click Edit Group on the toolbar.
- On the General tab, click Edit Selections for the Users in Group list. The Users in Group dialog will appear.
- In the dialog, select users you want to assign to the group and click the Add (right-arrow) button.
Figure 8: Assigning users to an extranet user group
- Click OK and save changes to the group.
Now that you have assigned users to groups, go on to set up extranet security on your website.
Only approved users can access protected resources of your website.
If you have chosen not to approve the users when adding them to the extranet, you can do it later.
All unapproved users are indicated with an icon of a lighter color in the Extranet perspective.
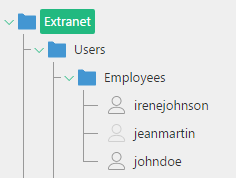
Figure 9: Approved and non-approved users
To approve users:
- In the Extranet perspective, expand Extranet.
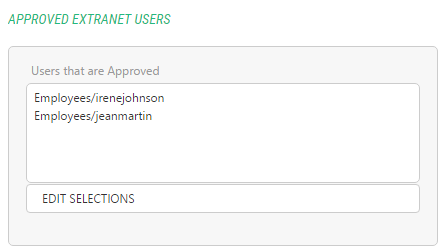
- Select Users and click Approve Users on the toolbar. The Approve Extranet Users form opens in the right pane.
Figure 10: Approved extranet users
- Click Edit Selections. The Users That Are Approved dialog appears.
- In the dialog, select users you want to approve and click the Add (right-arrow) button.
Figure 11: Selecting users for approval
- Click OK and save the changes.