
 Extranet Basic
Created by Orckestra
Extranet User Guide
- Introduction
- Creating and Managing Users and Groups
- Setting Security on Pages and Files
- Setting Up Optional Functionality
- Test Your Knowledge
Setting Up Optional Functionality
With the Extranet add-on you can allow your website visitors to register on their own in order to get access to your extranet-protected website resources.
Besides, your registered users can change their passwords directly on your website or have their passwords sent to them via email when forgotten.
In the following few sections, we will consider the steps required to add these possibilities to your extranet-protected website.
If you want any of your website visitors to register in your extranet by themselves, you should add a signup form to your website.
You can control this registration by:
- Automatically assigning all these users to a dedicated user group with restricted access to your website
- Specifying that all the users registered on your website in this manner are not approved until you approve them manually
To add a signup form to your website:
- In the Content perspective, create a new page for your website.
- Add the Composite.Community.Extranet.SignupForm function to this page. The function properties dialog appears.
- Specify the function’s parameters:
- Auto assigned groups: The groups the user is automatically assigned to on her or his registration. Required.
- Auto approve user: If the option is checked, all the users registering via this form will be automatically approved. By default, this option is unchecked. Required.
- User folder name: The user folder to add new users to.
- Success message: A message to show the user who has successfully signed up.
- Click OK and save and publish the changes.
- Click the Preview tab.
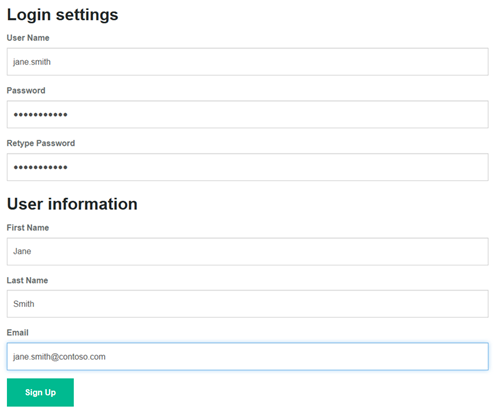
Figure 21: Signup form
The user should enter her or his user name used for logging in to the extranet, password as well as specify her or his name and email address and click Sign Up.
Setting Up Change Password Page
It is a good security practice to regularly change passwords. You can allow your registered users to change their passwords on your website by making use of the Change Password form.
To add the Change Password form to your website:
- In the Content perspective, create a new page for your website.
- Add the Composite.Community.Extranet.ChangePasswordForm function to this page.
- Save and publish the page.
- Click the Preview tab.
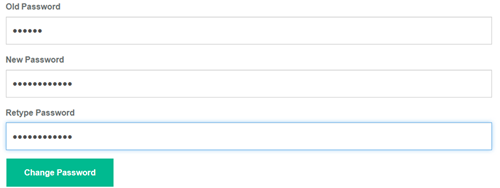
Figure 22: Change Password form
The user should enter her or his old password, then type a new one and retype it.
Setting Up Password Recovery Page
If registered users forget their passwords, they can have their passwords sent to them via email. All they need to do is to provide the email address they specified when they were registering. You can allow them to request a forgotten password making use of the Password Recovery form on your website.
To add the Password Recoveryform to your website:
- In the Content perspective, create a new page for your website.
- Add the Composite.Community.Extranet.PasswordRecoveryForm function to this page.
- Save and publish the page.
- Click the Preview tab.
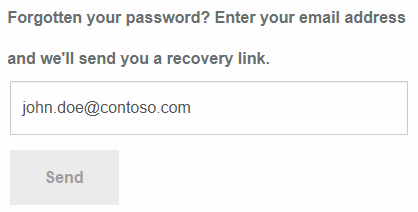
Figure 23: Password Recovery form
The user should enter her or his email address and click the Send button. If this email address belongs to one of the registered users, the latter will receive the password at the specified address.
Showing Group Specific Content
You can choose to only show some content to visitors who belong to one or more extranet groups and hide it from others:
- Edit a page in the Content perspective or a template in the Layout perspective.
- Click Insert > Functions in the Content perspective or Insert > Function Markup in the Layout perspective to open the Select Function window.
- Select the Composite.Community.Extranet.GroupSpecificContent function.
- In the Function Properties window, select the Content property and click Edit HTML.
- Write the content you want the members of specified extranet groups to see when opening the page.
- Click OK.
- In the Function Properties window, select the Group with access property and check the extranet groups the members of which will see the above content on the page. If users are not members of these groups, they will not see this content.
- Save the page.

Figure 24: Protecting content on a page